Getting Started with Scenic
Installation
Scenic requires Python 3.7 or newer. You can install Scenic from PyPI by simply running:
$ python -m pip install scenic
Alternatively, if you want to run some of our example scenarios, modify Scenic, or make use of features that have not yet been released on PyPI, you can download or clone the Scenic repository. Activate the virtual environment in which you would like to install Scenic, go into the root folder of the Scenic repository, and then run:
$ python -m pip install -e .
Either installation method will install all of the dependencies which are required to run Scenic. If you will be developing Scenic, you will want to use a variant of this command: see Developing Scenic.
Note
If you are using Windows, or encounter any errors during installation or trying the examples below, please see our Notes on Installing Scenic for suggestions.
Trying Some Examples
The Scenic repository contains many example scenarios, found in the examples directory.
They are organized by the simulator they are written for, e.g. GTA or Webots; there are also cross-platform scenarios written for Scenic’s abstract application domains, e.g. the driving domain.
Each simulator has a specialized Scenic interface which requires additional setup (see Supported Simulators); however, for convenience Scenic provides an easy way to visualize scenarios without running a simulator.
Simply run scenic, giving a path to a Scenic file:
$ scenic examples/gta/badlyParkedCar2.scenic
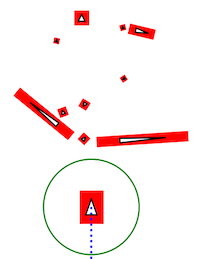
This will compile the Scenic program and sample from it, displaying a schematic of the resulting scene. Since this is the badly-parked car example from our GTA case study, you should get something like this:
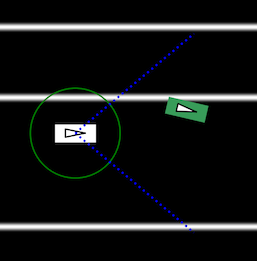
Here the circled rectangle is the ego car; its view cone extends to the right, where we see another car parked rather poorly at the side of the road (the white lines are curbs). If you close the window, Scenic will sample another scene from the same scenario and display it. This will repeat until you kill the generator (Control-c in Linux; right-clicking on the Dock icon and selecting Quit on OS X).
Scenarios for the other simulators can be viewed in the same way. Here are a few for different simulators:
$ scenic examples/driving/pedestrian.scenic
$ scenic examples/webots/mars/narrowGoal.scenic
$ scenic examples/webots/road/crossing.scenic
The scenic command has options for setting the random seed, running dynamic simulations, printing debugging information, etc.: see Command-Line Options.
Learning More
Depending on what you’d like to do with Scenic, different parts of the documentation may be helpful:
If you want to start learning how to write Scenic programs, see the Scenic Tutorial.
If you want to learn how to write dynamic scenarios in Scenic, see Dynamic Scenarios.
If you want to use Scenic with a simulator, see Supported Simulators (which also describes how to interface Scenic to a new simulator, if the one you want isn’t listed).
If you want to control Scenic from Python rather than using the command-line tool (for example if you want to collect data from the generated scenarios), see Using Scenic Programmatically.
If you want to add a feature to the language or otherwise need to understand Scenic’s inner workings, see our pages on Developing Scenic and Scenic Internals.