Getting Started with Scenic
Installation
Scenic requires Python 3.8 or newer.
Run python --version to make sure you have a new enough version; if not, you can install one from the Python website or using pyenv (e.g. running pyenv install 3.11).
If the version of Python you want to use is called something different than just python on your system, e.g. python3.11, use that name in place of python when creating a virtual environment below.
There are two ways to install Scenic:
from our repository, which has the very latest features but may not be stable. The repository also contains example scenarios such as those used in the instructions below and our tutorials.
from the Python Package Index (PyPI), which will get you the latest official release of Scenic but will not include example scenarios, etc.
If this is your first time using Scenic, we suggest installing from the repository so that you can try out the example scenarios.
Once you’ve decided which method you want to use, follow the instructions below for your operating system. If you encounter any errors, please see our Notes on Installing Scenic for suggestions.
Activate the virtual environment in which you want to install Scenic.
To create and activate a new virtual environment called venv, you can run the following commands:
python3 -m venv venv
source venv/bin/activate
Once your virtual environment is activated, you no longer need to use a name like python3 or python3.11; use just python to ensure you’re running the copy of Python in your virtual environment.
Next, make sure your pip tool is up-to-date:
python -m pip install --upgrade pip
Now you can install Scenic either from the repository or from PyPI:
The following commands will clone the Scenic repository into a folder called Scenic and install Scenic from there.
It is an “editable install”, so if you later update the repository with git pull or make changes to the code yourself, you won’t need to reinstall Scenic.
git clone https://github.com/BerkeleyLearnVerify/Scenic
cd Scenic
python -m pip install -e .
If you will be developing Scenic, you will want to use a variant of the last command to install additional development dependencies: see Developing Scenic.
The following command will install the latest full release of Scenic from PyPI:
python -m pip install scenic
Note that this command skips experimental alpha and beta releases, preferring stable versions. If you want to get the very latest version available on PyPI (which may still be behind the repository), run:
python -m pip install --pre scenic
You can also install specific versions with a command like:
python -m pip install scenic==2.0.0
Start by installing the Python-Tk interface. You can likely use your system’s package manager; e.g. on Debian/Ubuntu run:
sudo apt-get install python3-tk
Activate the virtual environment in which you want to install Scenic.
To create and activate a new virtual environment called venv, you can run the following commands:
python3 -m venv venv
source venv/bin/activate
Once your virtual environment is activated, you no longer need to use a name like python3 or python3.11; use just python to ensure you’re running the copy of Python in your virtual environment.
Next, make sure your pip tool is up-to-date:
python -m pip install --upgrade pip
Now you can install Scenic either from the repository or from PyPI:
The following commands will clone the Scenic repository into a folder called Scenic and install Scenic from there.
It is an “editable install”, so if you later update the repository with git pull or make changes to the code yourself, you won’t need to reinstall Scenic.
git clone https://github.com/BerkeleyLearnVerify/Scenic
cd Scenic
python -m pip install -e .
If you will be developing Scenic, you will want to use a variant of the last command to install additional development dependencies: see Developing Scenic.
The following command will install the latest full release of Scenic from PyPI:
python -m pip install scenic
Note that this command skips experimental alpha and beta releases, preferring stable versions. If you want to get the very latest version available on PyPI (which may still be behind the repository), run:
python -m pip install --pre scenic
You can also install specific versions with a command like:
python -m pip install scenic==2.0.0
These instructions cover installing Scenic natively on Windows; if you are using the Windows Subsystem for Linux (on Windows 10 and newer), see the WSL tab instead.
Activate the virtual environment in which you want to install Scenic.
To create and activate a new virtual environment called venv, you can run the following commands:
python -m venv venv
venv\Scripts\activate.bat
Once your virtual environment is activated, you no longer need to use a name like python3 or python3.11; use just python to ensure you’re running the copy of Python in your virtual environment.
Next, make sure your pip tool is up-to-date:
python -m pip install --upgrade pip
Now you can install Scenic either from the repository or from PyPI:
The following commands will clone the Scenic repository into a folder called Scenic and install Scenic from there.
It is an “editable install”, so if you later update the repository with git pull or make changes to the code yourself, you won’t need to reinstall Scenic.
git clone https://github.com/BerkeleyLearnVerify/Scenic
cd Scenic
python -m pip install -e .
If you will be developing Scenic, you will want to use a variant of the last command to install additional development dependencies: see Developing Scenic.
The following command will install the latest full release of Scenic from PyPI:
python -m pip install scenic
Note that this command skips experimental alpha and beta releases, preferring stable versions. If you want to get the very latest version available on PyPI (which may still be behind the repository), run:
python -m pip install --pre scenic
You can also install specific versions with a command like:
python -m pip install scenic==2.0.0
These instructions cover installing Scenic on the Windows Subsystem for Linux (WSL).
If you haven’t already installed WSL, you can do that by running wsl --install (in either Command Prompt or PowerShell) and restarting your computer. Then open a WSL terminal and run the following commands to install Python and the Python-Tk interface:
sudo apt-get update
sudo apt-get install python3 python3-tk
Activate the virtual environment in which you want to install Scenic.
To create and activate a new virtual environment called venv, you can run the following commands:
python3 -m venv venv
source venv/bin/activate
If you get an error about needing a package like python3.10-venv, run
sudo apt-get install python3.10-venv
(putting in the appropriate Python version) and try the commands above again.
Once your virtual environment is activated, you no longer need to use a name like python3 or python3.11; use just python to ensure you’re running the copy of Python in your virtual environment.
Next, make sure your pip tool is up-to-date:
python -m pip install --upgrade pip
Now you can install Scenic either from the repository or from PyPI:
The following commands will clone the Scenic repository into a folder called Scenic and install Scenic from there.
It is an “editable install”, so if you later update the repository with git pull or make changes to the code yourself, you won’t need to reinstall Scenic.
git clone https://github.com/BerkeleyLearnVerify/Scenic
cd Scenic
python -m pip install -e .
If you will be developing Scenic, you will want to use a variant of the last command to install additional development dependencies: see Developing Scenic.
The following command will install the latest full release of Scenic from PyPI:
python -m pip install scenic
Note that this command skips experimental alpha and beta releases, preferring stable versions. If you want to get the very latest version available on PyPI (which may still be behind the repository), run:
python -m pip install --pre scenic
You can also install specific versions with a command like:
python -m pip install scenic==2.0.0
You can now verify that Scenic is properly installed by running the command:
scenic --version
This should print out a message like Scenic 3.0.0 showing which version of Scenic is installed.
If you get an error (or got one earlier when following the instructions above), please see our Notes on Installing Scenic for suggestions.
Note
If a feature described in this documentation seems to be missing, your version of Scenic may be too old: take a look at What’s New in Scenic to see when the feature was added.
To help read Scenic code, we suggest you install a syntax highlighter plugin for your text editor. Plugins for Sublime Text and Visual Studio Code can be installed from within those tools; for other editors supporting the TextMate grammar format, the grammar is available here.
Trying Some Examples
The Scenic repository contains many example scenarios, found in the examples directory.
They are organized in various directories with the name of the simulator, abstract application domain, or visualizer they are written for. For example, gta and webots for the GTA and Webots simulators; the driving directory for the abstract driving domain; and the visualizer directory for the built in Scenic visualizer.
Each simulator has a specialized Scenic interface which requires additional setup (see Supported Simulators); however, for convenience Scenic provides an easy way to visualize scenarios without running a simulator. Simply run scenic, giving a path to a Scenic file:
scenic examples/webots/vacuum/vacuum_simple.scenic
This will compile the Scenic program and sample from it (which may take several seconds), displaying a schematic of the resulting scene. Since this is a simple scenario designed to evaluate the performance of a robot vacuum, you should get something like this:
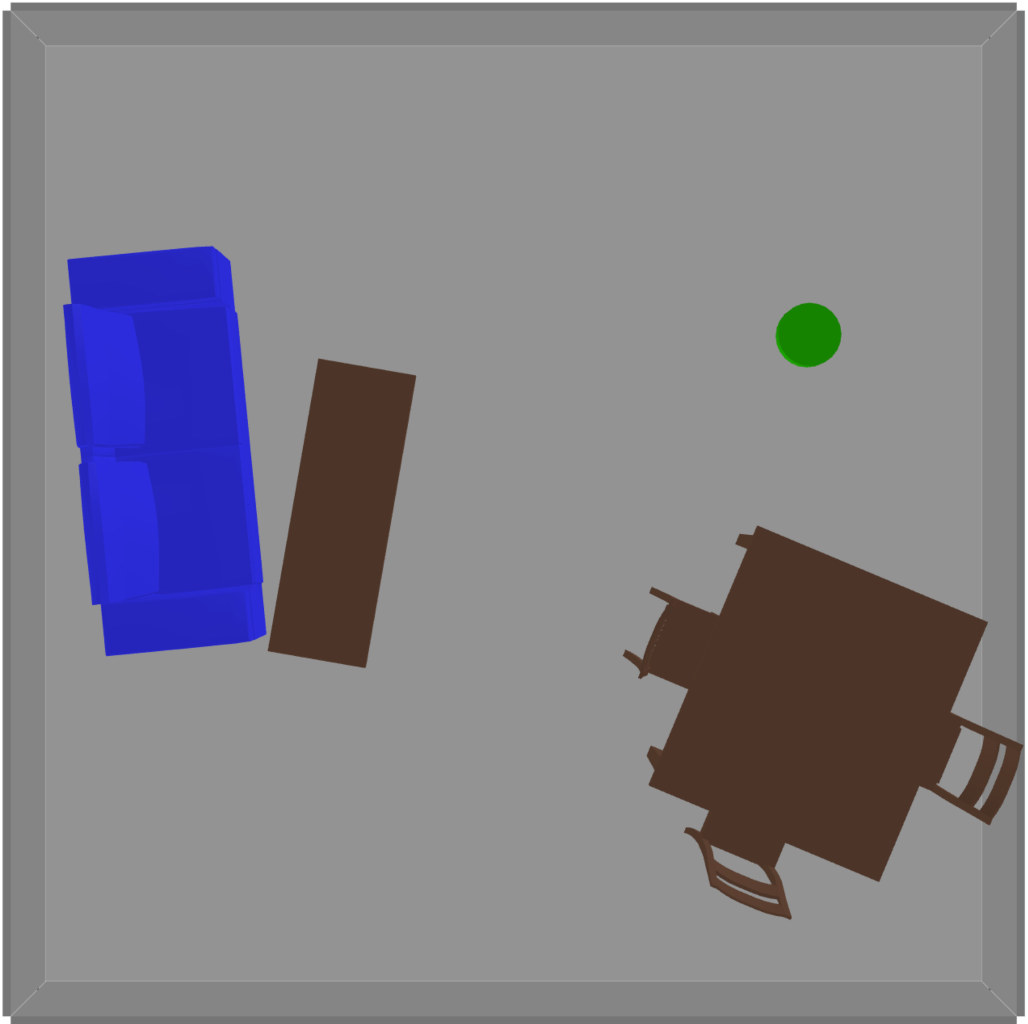
The green cylinder is the vacuum, surrounded by various pieces of furniture in a room. You can adjust the camera angle by clicking and dragging, and zoom in and out using the mouse wheel. If you close the window or press q, Scenic will sample another scene from the same scenario and display it. This will repeat until you kill the generator (Control-c in the terminal on Linux; Command-q in the viewer window on MacOS).
Some scenarios were written for older versions of Scenic, which were entirely 2D. Those scenarios should be run using the --2d command-line option, which will enable 2D backwards-compatibility mode. Information about whether or not the --2d flag should be used can be found in the README of each example directory.
One such scenario is the badly-parked car example from our GTA case study, which can be run with the following command:
scenic --2d examples/gta/badlyParkedCar2.scenic
This will open Scenic’s 2D viewer, and should look something like this:
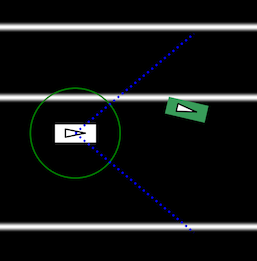
Here the circled rectangle is the ego car; its view cone extends to the right, where we see another car parked rather poorly at the side of the road (the white lines are curbs). (Note that on MacOS, scene generation with the 2D viewer is stopped differently than with the 3D viewer: right-click on its icon in the Dock and select Quit.)
Scenarios for the other simulators can be viewed in the same way. Here are a few for different simulators:
scenic --2d examples/driving/pedestrian.scenic
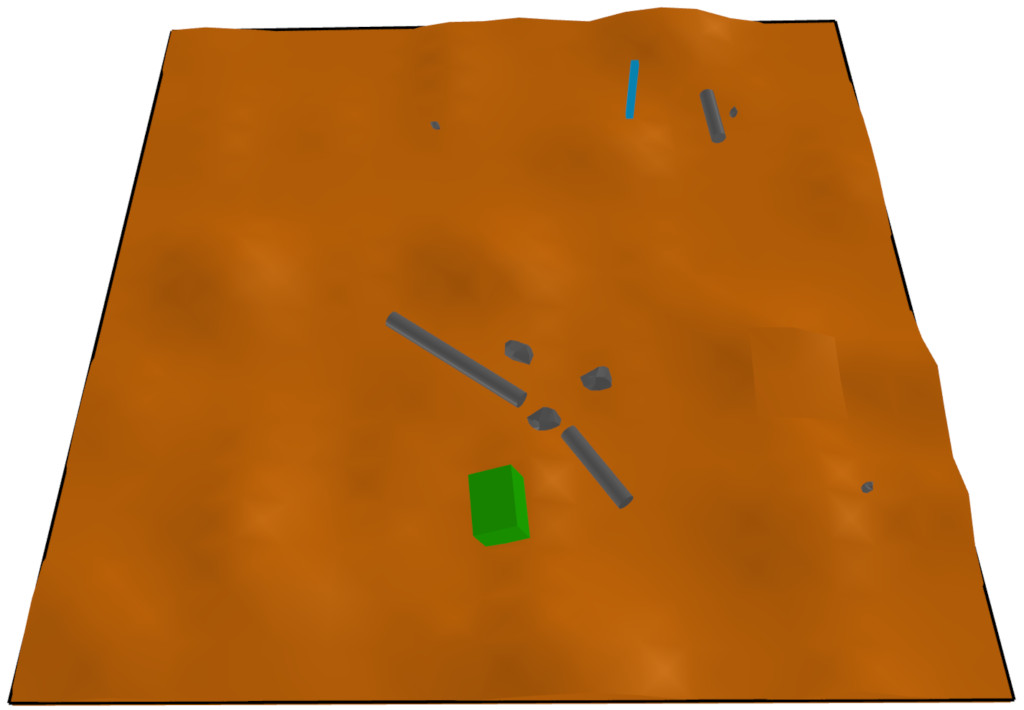
scenic examples/webots/mars/narrowGoal.scenic
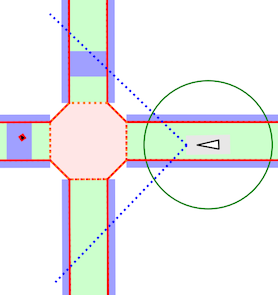
scenic --2d examples/webots/road/crossing.scenic

The scenic command has options for setting the random seed, running dynamic simulations, printing debugging information, etc.: see Command-Line Options.
Learning More
Depending on what you’d like to do with Scenic, different parts of the documentation may be helpful:
If you want to start learning how to write Scenic programs, see Scenic Fundamentals.
If you want to learn how to write dynamic scenarios in Scenic, see Dynamic Scenarios.
If you want to use Scenic with a simulator, see Supported Simulators (which also describes how to interface Scenic to a new simulator, if the one you want isn’t listed).
If you want to control Scenic from Python rather than using the command-line tool (for example if you want to collect data from the generated scenarios), see Using Scenic Programmatically.
If you want to add a feature to the language or otherwise need to understand Scenic’s inner workings, see our pages on Developing Scenic and Scenic Internals.